
how to replace car battery terminal clamps is a straightforward job when you slow down, follow the safety order, and match the clamp style to your battery cables. Most people tackle this because of hard starts, flickering electronics, or clamps that spin on the posts no matter how much you tighten them.
It matters more than it sounds because battery connections carry high current, a “kind of working” clamp can cause intermittent no-starts, voltage drop, or heat at the connection. And if you accidentally short the battery, the spark is real, not the movie kind.
This guide walks you through when clamps truly need replacement, what to buy, how to remove the old ones without damaging the cables, and how to verify the fix with a few quick checks. I’ll also point out the spots where DIY tends to go sideways.
What “terminal clamps” are and when replacement makes sense
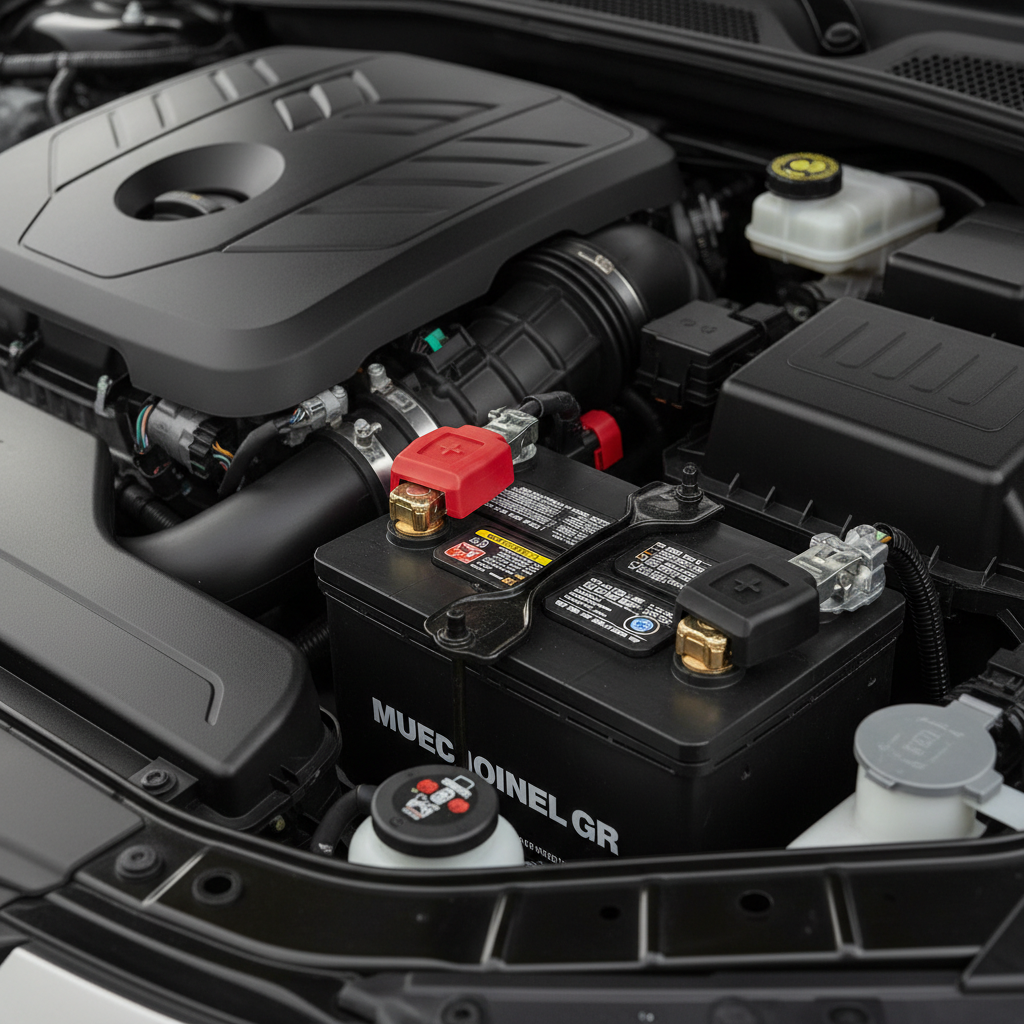
Terminal clamps are the metal connectors that clamp onto the battery posts, usually marked positive (+, often red) and negative (−, often black). They’re separate from the battery itself and, depending on your car, may also include extra small leads for sensors or accessory power.
Replace the clamps (not just clean them) when you see one of these:
- Cracks or missing metal around the clamp ring or bolt area
- Clamp won’t tighten because threads are stripped or the gap is “bottomed out”
- Severe corrosion pitting that keeps coming back after cleaning
- Damaged cable end where the clamp attaches (frayed copper, green powdery corrosion wicking up the cable)
- After a battery post repair or incorrect clamp size caused a loose fit
If corrosion is light and the clamp tightens firmly, you often can clean and protect it instead of replacing. But if the clamp rotates on the post by hand, that’s usually past “just cleaning.”
Quick self-check: are your symptoms coming from the clamps?
Before buying parts, do a fast diagnosis. Many starting problems are the battery itself, a failing alternator, or a bad starter. The clamps are common, but not automatic.
- Wiggle test (engine off): if the clamp moves on the post, that’s a strong clue.
- Visual check: white/blue crust at the connection, dark burn marks, or melted plastic nearby suggests heat or arcing.
- Single click/no crank that changes when you press or twist the clamp is suspicious.
- Voltage drop signs: headlights dim noticeably during cranking even with a fairly new battery can be connection-related.
According to NHTSA, battery safety includes keeping sparks and flames away from batteries because they can emit flammable hydrogen gas, especially around charging and jump-starting. Treat clamp work as a “no sparks on purpose” job.
Choosing the right replacement clamps (this is where many people mis-buy)
Not all clamps are the same, and the “universal” rack has some traps. Match what you have, and match what your car expects.
Clamp styles you’ll see
- Standard top-post clamps: common on most U.S. vehicles.
- Military-style terminals: chunky clamp with a bolt-through design, often used in off-road or aftermarket setups.
- OEM-style with extra leads: includes auxiliary studs or integrated sensor wiring, more common on newer cars.
If your negative terminal has a battery sensor module (often part of the negative cable assembly), don’t assume you can replace only the clamp. In many cases you replace the entire cable assembly to keep the sensor intact.
What to buy, practically
- Two clamps (positive and negative) or a matched pair, top-post size for your battery type
- If your cable ends are corroded under the insulation, consider new battery cables too
- Heat-shrink or terminal covers if your original protection is torn
Key point: soft lead “shim” spacers can be a temporary band-aid for a slightly loose fit, but if the clamp can’t hold torque or the post is damaged, replacement is the cleaner solution.
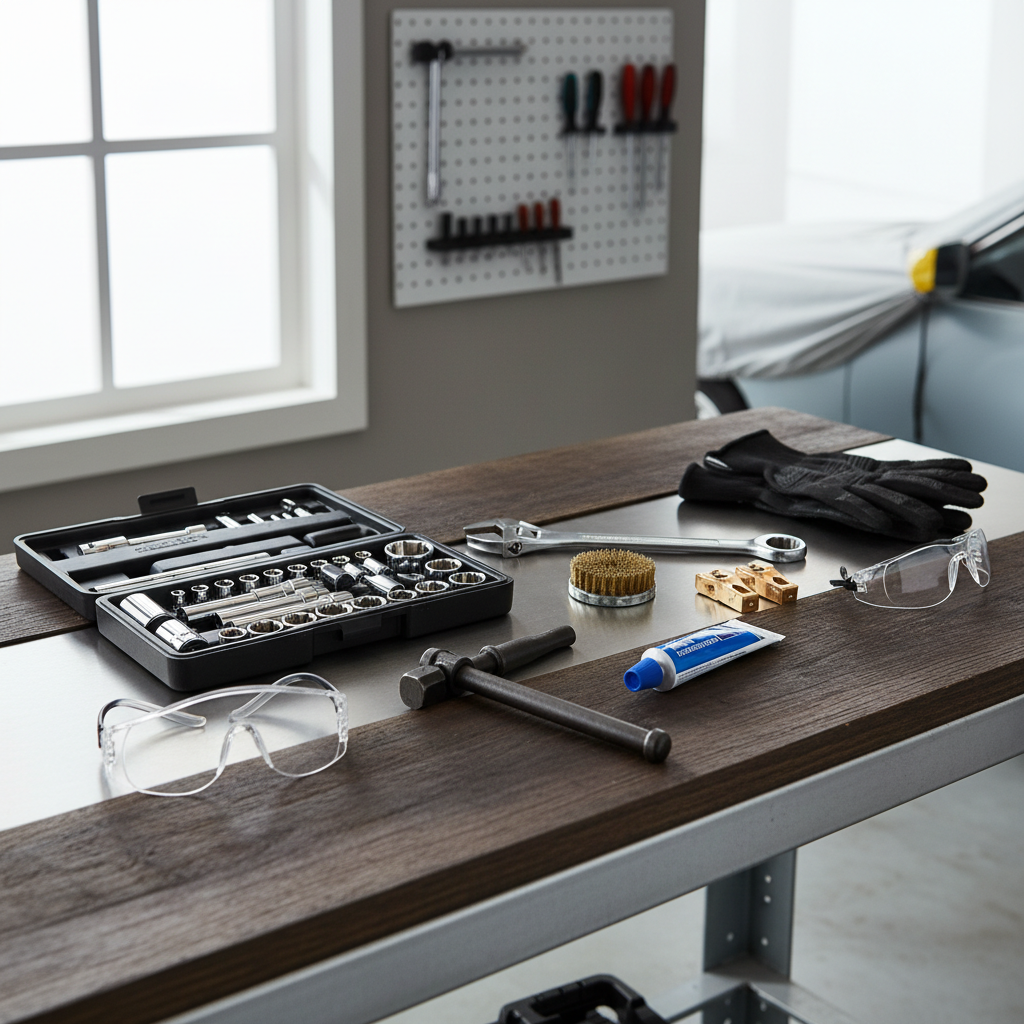
Tools and materials you’ll want before you start
Having the right tools keeps you from rounding bolts or yanking on cables.
- Safety glasses and gloves
- Wrench or socket set (common sizes are 8mm, 10mm, 13mm, but varies)
- Battery terminal puller (optional but helpful if clamps are stuck)
- Wire brush or battery post cleaner tool
- Baking soda + water (for neutralizing acid residue) and rags
- Dielectric grease or battery terminal protectant spray
- New clamps, plus any ring terminals/bolts included
According to OSHA, employers must provide appropriate eye and face protection when there is a risk from flying particles or chemical exposure; even at home, eye protection is a smart baseline because corrosion dust and accidental sparks happen fast.
Step-by-step: how to replace car battery terminal clamps safely
This sequence matters because it reduces the chance of shorting the battery with your tool.
1) Power down and locate your battery
Turn the car off, remove the key, and wait a minute. If you have memory settings you care about, you may want a memory saver, but it’s optional and can introduce its own risks if used incorrectly.
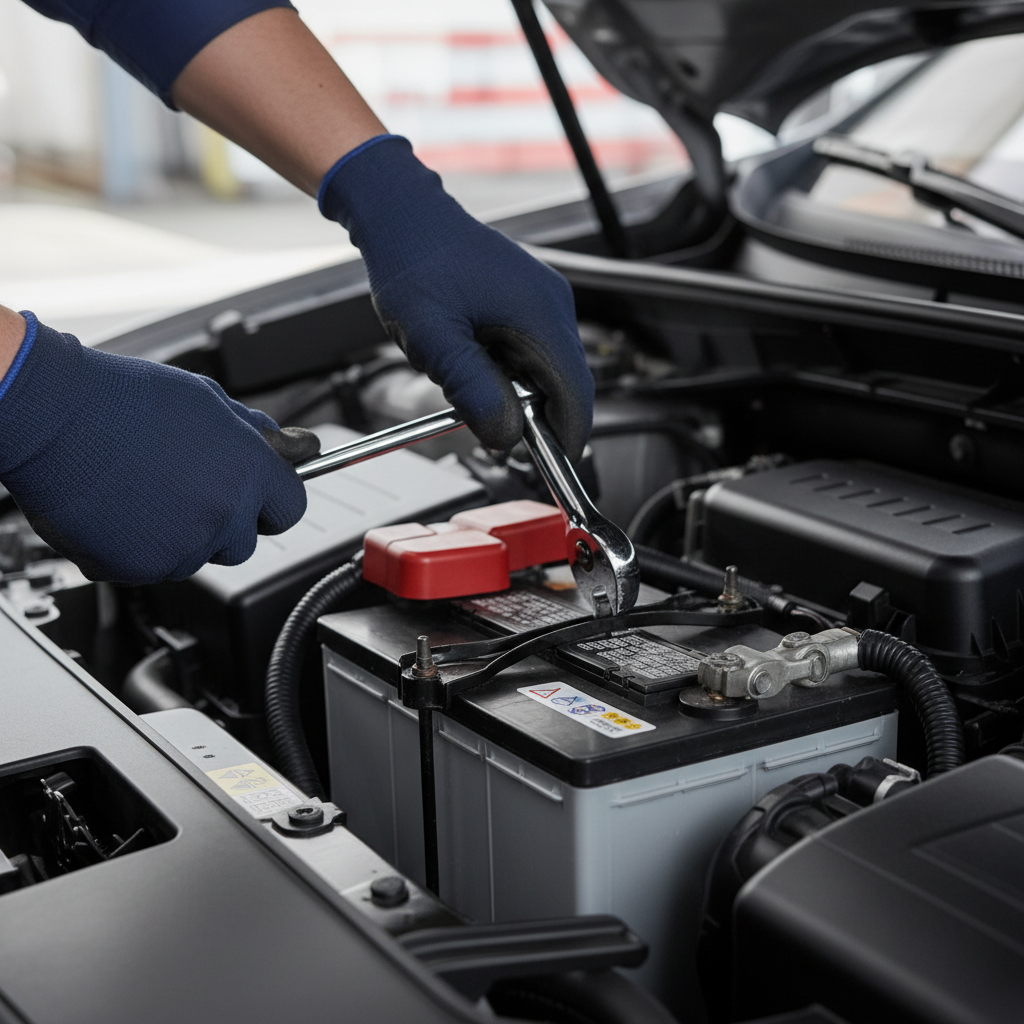
2) Disconnect in the right order
- Remove the negative (−) clamp first.
- Then remove the positive (+) clamp.
Why: with negative disconnected, your wrench touching metal body parts is less likely to complete a circuit.
3) Remove the old clamps without damaging the cables
Loosen the clamp pinch bolt and lift the clamp straight up. If it’s stuck, use a terminal puller or gently work it up, avoid prying hard against the battery case. If your clamp is a bolt-on style attached to bare cable strands, loosen the fastener and inspect the copper. If you see green corrosion traveling up the cable, replacement of the cable end (or full cable) may be the only lasting fix.
4) Clean the posts and cable ends
Mix baking soda and water, dab it on corrosion, then scrub with a brush. Don’t dump liquid everywhere, use controlled amounts and wipe clean. Dry the area well so your new connection doesn’t start life wet and salty.
5) Install the new clamps
- Fit the new clamp onto the cable (if it’s a bolt-on cable type), tighten its fastener firmly.
- Push the clamp fully down on the correct post, it should sit low and square.
- Tighten the pinch bolt until the clamp doesn’t rotate by hand. Don’t over-torque and crack softer metals.
6) Reconnect in the opposite order
- Connect the positive (+) first.
- Then connect the negative (−).
7) Protect the connection
A thin film of dielectric grease around the outside of the connection, or a terminal protectant spray, helps slow future corrosion. Don’t pack grease between metal contact surfaces unless the product specifically says it’s designed for that use.
Verification: make sure the repair actually solved the problem
After replacement, do a quick “trust but verify.” This saves you from blaming the starter when the real issue is a loose cable end.
- Hand check: clamps should not twist on the posts.
- Start test: engine should crank consistently, not “sometimes.”
- Accessory test: headlights and cabin electronics should look steady at idle.
If you have a multimeter, a basic voltage drop check during cranking can reveal hidden resistance. If you’re not comfortable doing electrical tests around a battery, it’s reasonable to ask a shop to confirm.
Common mistakes that cause repeat corrosion or no-starts
- Buying the wrong clamp type: especially on vehicles with sensor-equipped negative terminals.
- Not seating the clamp fully: tightening a clamp high on the tapered post feels tight, then loosens later.
- Over-tightening: stripped threads or cracked clamp ears create a permanent “won’t tighten” problem.
- Ignoring cable corrosion under insulation: the outside looks fine, the copper inside is compromised.
- Mixing metals without protection: some aftermarket clamps corrode faster in harsh climates if left unprotected.
At-a-glance table: symptoms, likely cause, what to do
| What you notice | Likely cause | What usually helps |
|---|---|---|
| Clamp spins on post | Worn/incorrect clamp, stripped bolt | Replace clamp, confirm correct top-post size |
| White/blue crust keeps returning | Acid vapor + moisture, poor sealing, loose fit | Clean thoroughly, tighten correctly, add protectant |
| No crank, improves when you jiggle cable | Intermittent contact at terminal or cable end | Replace clamp and inspect cable for internal corrosion |
| Hot terminal area after starting attempts | High resistance connection | Stop, re-check seating/torque, inspect for damaged cable |
| Multiple warning lights after reconnect | Normal module reset, or sensor cable issue | Drive cycle may clear, if persists scan codes or consult a pro |
When to stop DIY and get professional help
If you see melted insulation, a battery case that looks swollen, or heavy corrosion traveling far up the cable, it’s worth getting a mechanic involved. Same idea if your vehicle uses an intelligent battery sensor and you’re not sure how it’s integrated, replacing the wrong piece can create charging or start-stop issues.
Also, if your car still struggles after you’ve confirmed a solid clamp fit, you may be chasing battery health, alternator output, starter draw, or a parasitic drain. A shop can test these quickly with the right equipment.
Key takeaways before you grab the wrench
- Disconnect negative first, reconnect negative last to reduce short risk.
- A clamp that won’t tighten is usually replacement territory, not “one more turn.”
- Corrosion under insulation often means the cable needs more than a new clamp.
- Finish by protecting the terminals so the fix lasts.
If you want one simple next step, it’s this: buy the correct clamp style for your vehicle, then take five extra minutes to clean and dry everything before the new clamp goes on, that’s what keeps the repair from becoming a repeat chore.
FAQ
How do I know if I need to replace the clamp or the entire battery cable?
If corrosion is only on the surface of the clamp and the copper at the cable end looks bright after cleaning, a clamp may be enough. If you see green corrosion creeping under insulation, broken strands, or heat damage, replacing the cable assembly is often the more reliable move.
Can I replace only the positive terminal clamp?
Yes, if only that side is damaged. That said, if both clamps are the same age and one has stripped threads, the other might not be far behind, so many people replace both for consistency.
What order should I disconnect and reconnect the battery terminals?
Disconnect negative (−) first, then positive (+). Reconnect positive first, then negative. This order reduces the chance your tool creates an accidental short to chassis ground.
Is it normal to see sparks when reconnecting the terminal?
A tiny spark can happen, especially when reconnecting the negative, because modules wake up and draw current. A large snap or repeated sparking suggests a bigger load or potential short, if you’re unsure, stop and consider professional help.
Do I need a battery terminal puller?
Not always, but it’s helpful when clamps are seized from corrosion. Prying with a screwdriver can crack the battery case or deform the clamp, so a puller is a safer bet if the connection is stubborn.
What’s the best way to prevent corrosion after replacing clamps?
Start with a tight, fully seated connection, then add terminal protectant or a light coating of dielectric grease around the exterior. If your car lives in humid or salty conditions, checking the terminals during oil changes keeps small buildup from turning into a no-start.
If I’m learning how to replace car battery terminal clamps, should I also replace the battery?
Only if the battery is old, tests weak, or shows physical issues. If the car starts strongly after the clamp repair and the battery tests fine, replacement may be unnecessary.
If you’re replacing clamps because the car has intermittent no-starts or stubborn corrosion, and you’d rather avoid guessing on clamp type or sensor-equipped cables, a local parts professional or a trusted shop can help match the correct terminals and confirm the charging system, usually with a quick test before you spend more money.