
how to fix car door handle inside usually comes down to one of a few issues: a loose handle, a stretched or disconnected cable/rod, a broken plastic clip, or a latch that sticks and won’t release.
If your inside handle suddenly goes floppy, only opens the door sometimes, or works only when you pull hard, it’s tempting to keep yanking and “deal with it later.” The problem is, that habit often breaks the remaining clips or bends the linkage, turning a small fix into a bigger one.
Below is a practical way to diagnose what failed, open the door panel without creating new rattles, and get the handle working again. I’ll also flag the moments where it’s smarter to stop and let a shop handle it, especially if side airbags or electronic latches are involved.
What usually breaks (and what it feels like)
Most inside-handle failures feel dramatic, but the cause is often small. Here are the common patterns and what they point to.
- Handle feels loose or “dead”: Cable popped off, rod clip broke, or the handle pivot cracked.
- Handle pulls, but door won’t open: Latch mechanism sticking, cable stretched, or child lock engaged on rear doors.
- Works only if you pull very hard: Dry or contaminated latch, misadjusted cable, partially broken clip.
- Opens the door, but doesn’t return smoothly: Weak return spring, binding cable routing, handle pivot friction.
- Only fails in cold or after rain: Moisture in latch, frozen grease, or corrosion in linkage.
In many vehicles, the inside handle pulls a Bowden cable (a sheathed cable like a bike brake) or a metal rod. A $5 plastic retainer clip often ends up being the real culprit.
Quick self-check before you remove anything
Before you start prying panels, take 2 minutes to narrow the issue. It saves time and reduces the chance of snapping trim clips.
- Confirm the lock state: Unlock the door with the key fob and the door switch, then try again.
- Rear door? Check the child safety lock at the door edge. People miss this more than they admit.
- Test the outside handle: If outside opens fine but inside fails, the latch is probably OK and the issue is inside linkage/handle.
- Listen while pulling: A soft “click” with no release can mean the cable is moving but not enough.
- Check for resistance: Zero resistance often means a disconnected cable/rod; heavy resistance can mean a binding latch.
If the door won’t open from either handle, you may be dealing with a latch jam. That can still be DIY, but access gets trickier and sometimes requires removing the panel with the door closed.
Tools and parts you’ll likely need
You don’t need a full toolbox, but a few items make the job cleaner and help avoid cosmetic damage.
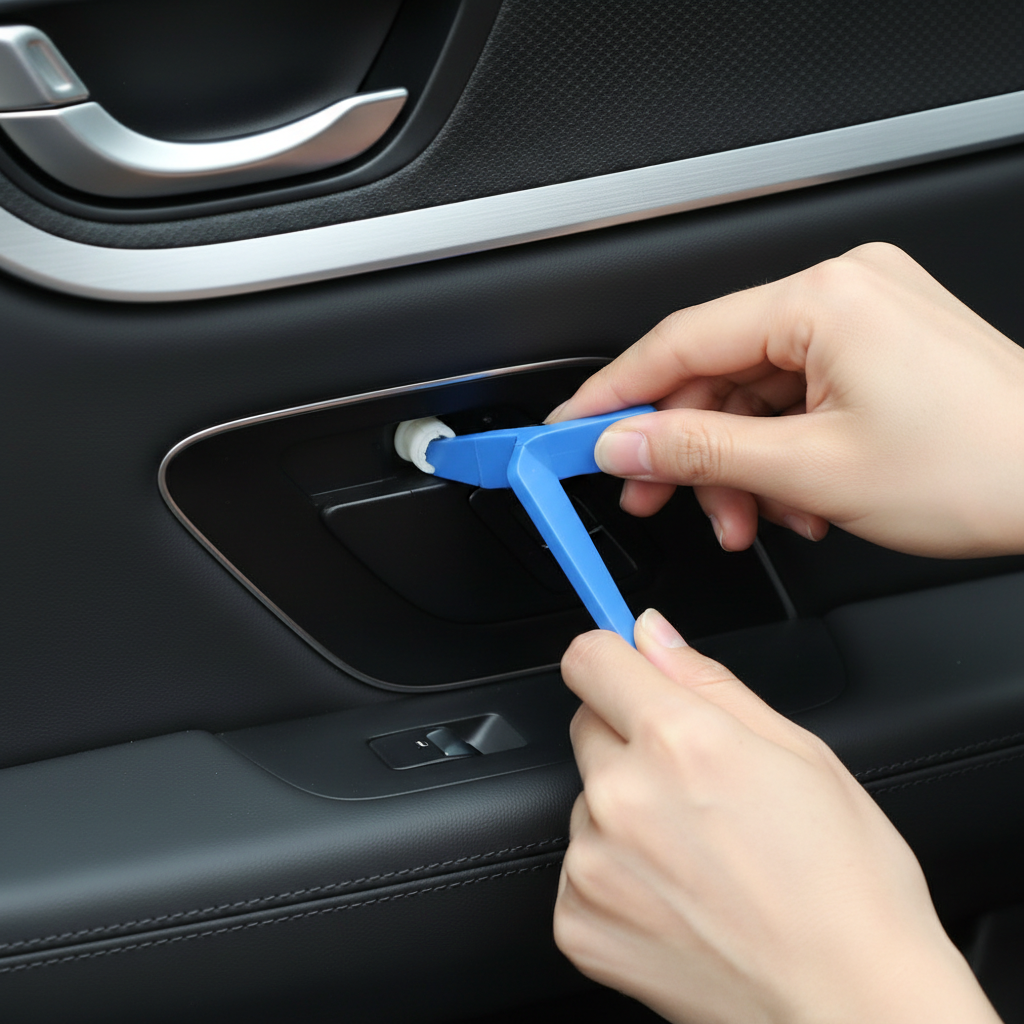
- Trim removal tools (plastic pry tools)
- Phillips and flathead screwdrivers
- Socket set (often 8mm, 10mm) or Torx bits (T20/T25 are common)
- Needle-nose pliers or hook tool (for clips and cable ends)
- Replacement door panel clips (smart to buy extras)
- Light grease or spray lubricant safe for latches
- Painter’s tape (protects painted and soft-touch areas)
Part sourcing tip: the inside handle assembly, cable, and clips can vary by trim level. If possible, match by VIN at a dealer parts counter or a reputable online catalog.
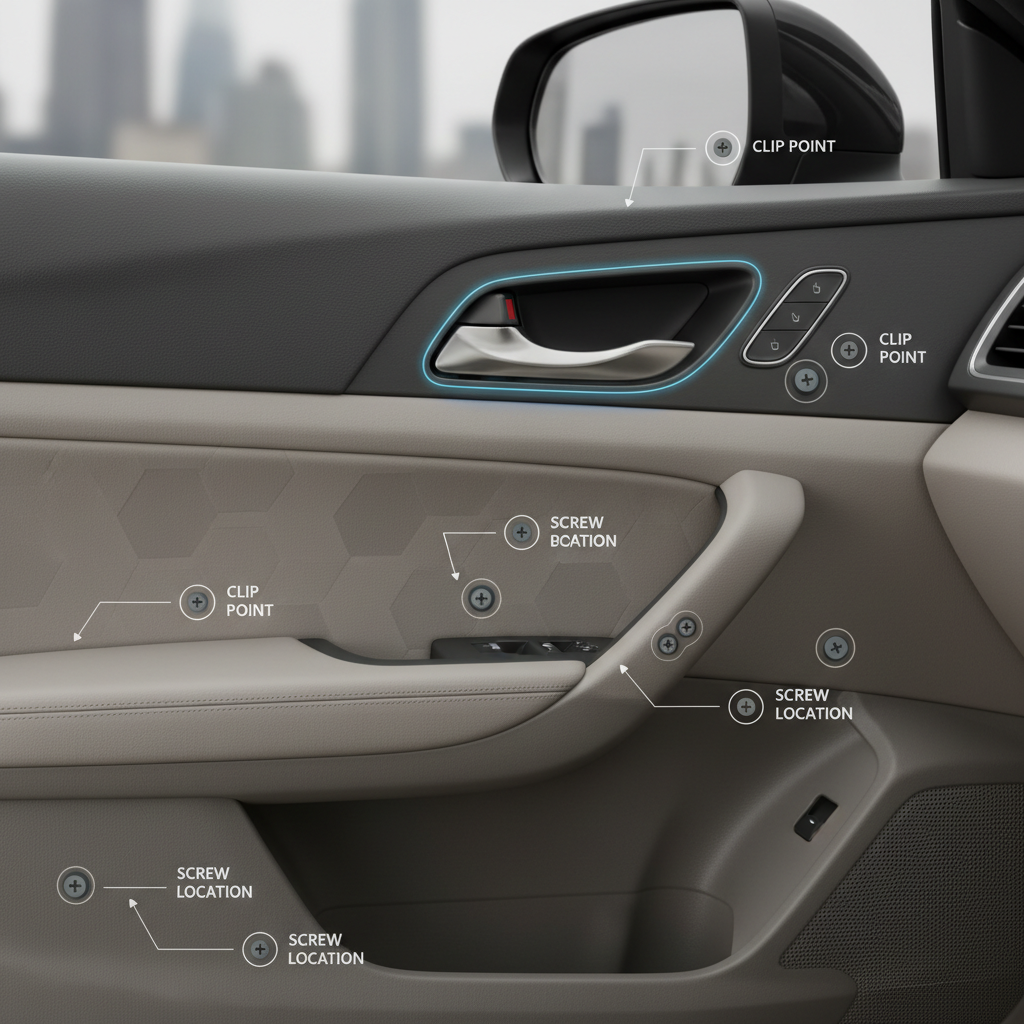
How to remove the door panel without making it worse
This is the step where most DIY repairs go sideways. Slow is fast here.
Safety note: If your door has a side airbag, disconnecting the battery may be recommended. According to NHTSA, airbags can deploy with enough force to cause serious injury, so if you’re unsure about working near airbag components, it’s reasonable to consult a qualified technician.
Typical removal flow (most cars follow some version of this):
- Find hidden screws: Check behind the interior handle bezel, under armrest caps, in the pull handle pocket, and near the mirror sail panel.
- Remove switch panels gently: Window/lock switch pods often pop up, then unplug the harness.
- Start prying at the bottom edge: Work around the perimeter to release clips. Use steady pressure, not twisting force.
- Lift the panel upward: Many panels hook over the window ledge, so lifting matters after clips release.
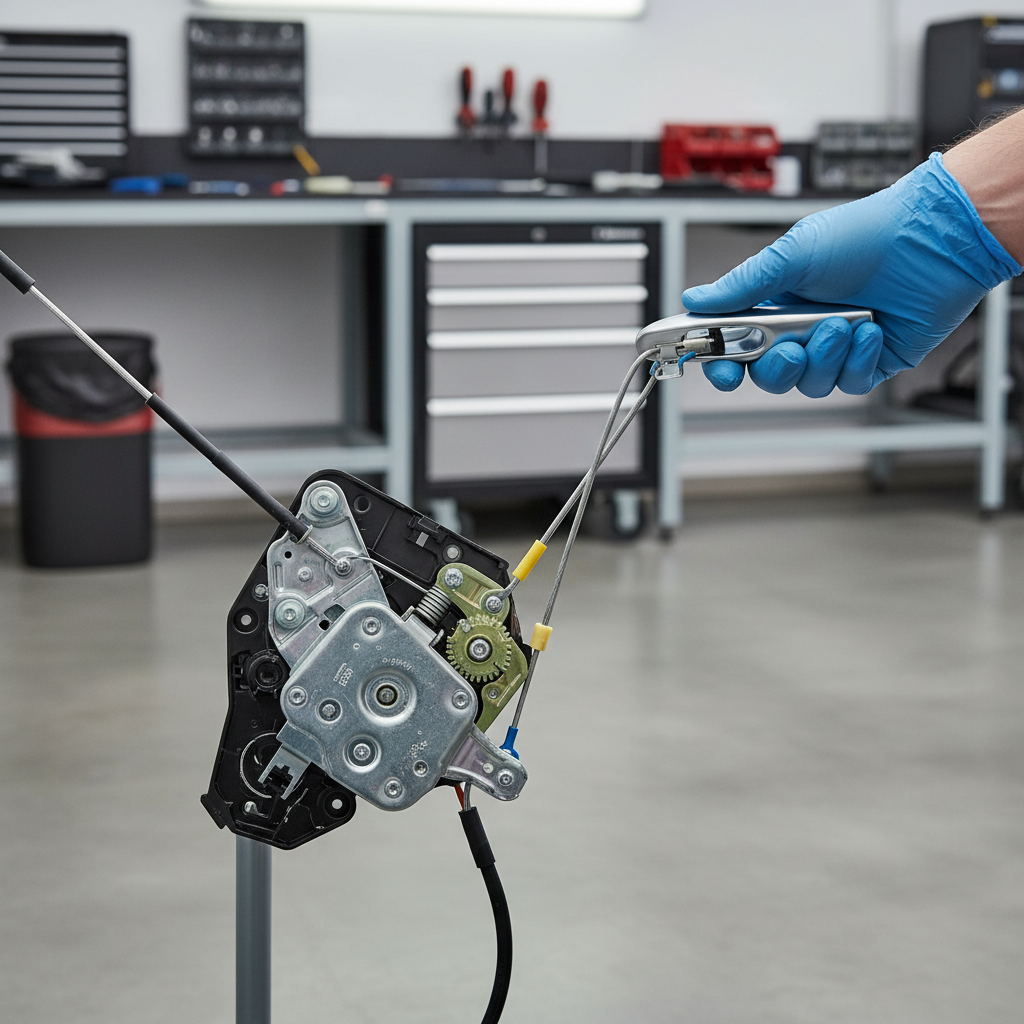
- Disconnect cables: The inside handle cable usually has a ball end and a clip-in sheath. Note the routing before you remove it.
- Peel the vapor barrier carefully: If you need access deeper inside, don’t tear it; press it back into the butyl adhesive when done.
If you break several clips, the panel may later buzz or gap at the edges. Replacing clips is cheap; ignoring them rarely stays quiet.
Fix options by root cause (what to do once the panel is off)
Once you can see the back of the handle and the linkage, the repair usually becomes obvious. Here’s the realistic menu of fixes.
1) Cable popped off the handle or latch
- Inspect the cable end: the metal ball should sit fully in the handle lever.
- Make sure the sheath locks into its bracket. If the sheath isn’t anchored, pulling the handle won’t pull the latch.
- Check routing: sharp bends can add friction and reduce travel.
If the cable housing retainer is cracked, replace the cable. Trying to “make it work” with zip ties sometimes holds briefly, but it often changes the pull length and causes repeat failures.
2) Plastic linkage clip/retainer broke (rod-style systems)
- Look for a rod hanging free near the handle or latch.
- Replace the clip with the correct size. Many clips look similar but don’t hold the rod tightly.
- Confirm the rod rotates freely without binding against the door shell.
These clips are a classic weak point, especially in older vehicles where heat cycles make plastic brittle.
3) Handle pivot cracked or return spring failed
- If the handle body flexes, has a visible crack, or the pivot pin area looks distorted, replace the handle assembly.
- Transfer any trim bezel parts carefully to avoid scuffs.
- After install, verify smooth return and full travel.
When the handle itself fails, lubrication won’t fix it. It might feel better for a day, then the crack spreads.
4) Latch sticks or doesn’t release
- Manually actuate the latch lever while watching the mechanism, compare movement to a working door if possible.
- Clean and lubricate the latch contact points lightly. Avoid soaking electrical connectors.
- Check alignment: if the striker on the body is misaligned, the latch can bind.
According to SAE International, proper lubrication and maintenance practices can reduce wear in mechanical systems; for door latches, a light, appropriate lubricant often helps, but avoid heavy grease in dusty environments where it can turn into abrasive paste.
Diagnosis table: symptom → likely cause → DIY difficulty
This is the fastest way to decide whether you’re in “clip replacement” territory or “time to book a shop” territory.
| Symptom | Most likely cause | DIY difficulty |
|---|---|---|
| Inside handle pulls with no resistance | Cable/rod disconnected, broken retainer clip | Low to Medium |
| Handle feels loose and wobbly | Handle pivot crack, missing fastener | Medium |
| Must pull hard to open | Sticking latch, stretched cable, binding routing | Medium |
| Neither inside nor outside opens door | Latch jam, severe linkage failure | High |
| Works sometimes, worse in cold/wet | Moisture/corrosion in latch, thickened grease | Medium |
Reassembly and testing (don’t skip this part)
Before you snap the panel back on, test the mechanism with the door open. It feels a bit silly, but it prevents the classic mistake: reassembling everything only to find the cable still isn’t seated.
- Test inside handle: Confirm it fully releases the latch.
- Test outside handle: Make sure you didn’t disturb the outer linkage.
- Test lock/unlock: Power locks should cycle normally without binding.
- Check window switch wiring: Ensure connectors click in and the harness isn’t pinched.
- Confirm clip alignment: Line up panel clips with their holes before pressing.
Key point: If the handle works with the panel off but fails after reassembly, the cable may be routed incorrectly or getting pinched by the panel.
Common mistakes that waste time (and how to avoid them)
- Forcing the panel off without finding screws: Many doors have one “gotcha” screw behind a small cap.
- Breaking the vapor barrier: Tears can contribute to water leaks and wind noise.
- Using the wrong clip: It may fit but not lock, so the rod pops off again.
- Over-lubricating: A dripping latch attracts dirt; use a controlled amount.
- Ignoring alignment: If the door has sag or striker misalignment, you can fix the handle and still fight a sticky close/open.
If you’re trying to figure out how to fix car door handle inside because it “kind of works,” focus on consistency, not just getting it to open once. Intermittent issues are usually a sign the clip or cable seating is marginal.
When it’s smarter to call a professional
Some inside-handle repairs are straightforward, but a few scenarios justify a shop visit.
- Door stuck shut: Panel removal with the door closed can damage trim and weather seals.
- Side airbag in the door: If you’re unsure about safe handling, get help.
- Electronic or “soft-close” latch systems: Diagnosis may require scan tools and service procedures.
- Repeated failures: If clips keep popping, the latch, striker, or handle geometry may be off.
A good independent shop can often diagnose the exact failure quickly because they’ve seen the same weak points on common models.
Practical takeaway and next steps
If your inside handle stopped working, the best path is simple: confirm it’s not a lock/child-lock issue, remove the panel carefully, then look for a disconnected cable/rod or a broken clip before assuming you need a whole latch.
Your next action: pick up a trim tool kit and a few spare panel clips, set aside a focused hour, and test the handle with the panel off before reassembly. If the door won’t open at all or you’re working near an airbag, booking a professional inspection is often the less stressful move.