
How to detail a car at home comes down to two things: using the right products in the right order, and slowing down on the steps that actually change how the car looks (wash technique, paint decontamination, protection).
If you’ve ever finished a “quick detail” and still saw haze on the paint, streaks on the glass, or that dusty smell inside, it’s usually not effort, it’s process. Most DIY results fall apart because people skip prep, mix chemicals, or try to polish without knowing what the paint needs.
This guide gives you a realistic “pro at home” workflow: what to buy (and what to skip), how to wash without adding swirls, how to clean wheels safely, and how to protect paint so the clean look lasts weeks, not days.
What “pro-level” detailing at home really means
Professional results usually come from consistency and surface prep, not exotic products. You’re aiming for three outcomes: a clean surface, corrected surface (optional), and protected surface.
- Clean: remove loose dirt, traffic film, and interior grime without scratching.
- Decontaminate: remove bonded contaminants (tar, iron particles) that washing leaves behind.
- Protect: add a sacrificial layer (sealant, wax, ceramic spray) so dirt releases easier next wash.
Correction (polishing) sits between decon and protection. It’s powerful, but it’s also where many DIYers create haze or burn edges, so treat it as optional unless you’re ready.
Tools and chemicals: the short list that actually matters
You can detail with a small kit if you choose items that reduce risk. If you buy only a few upgrades, prioritize quality microfiber and safe wash technique.
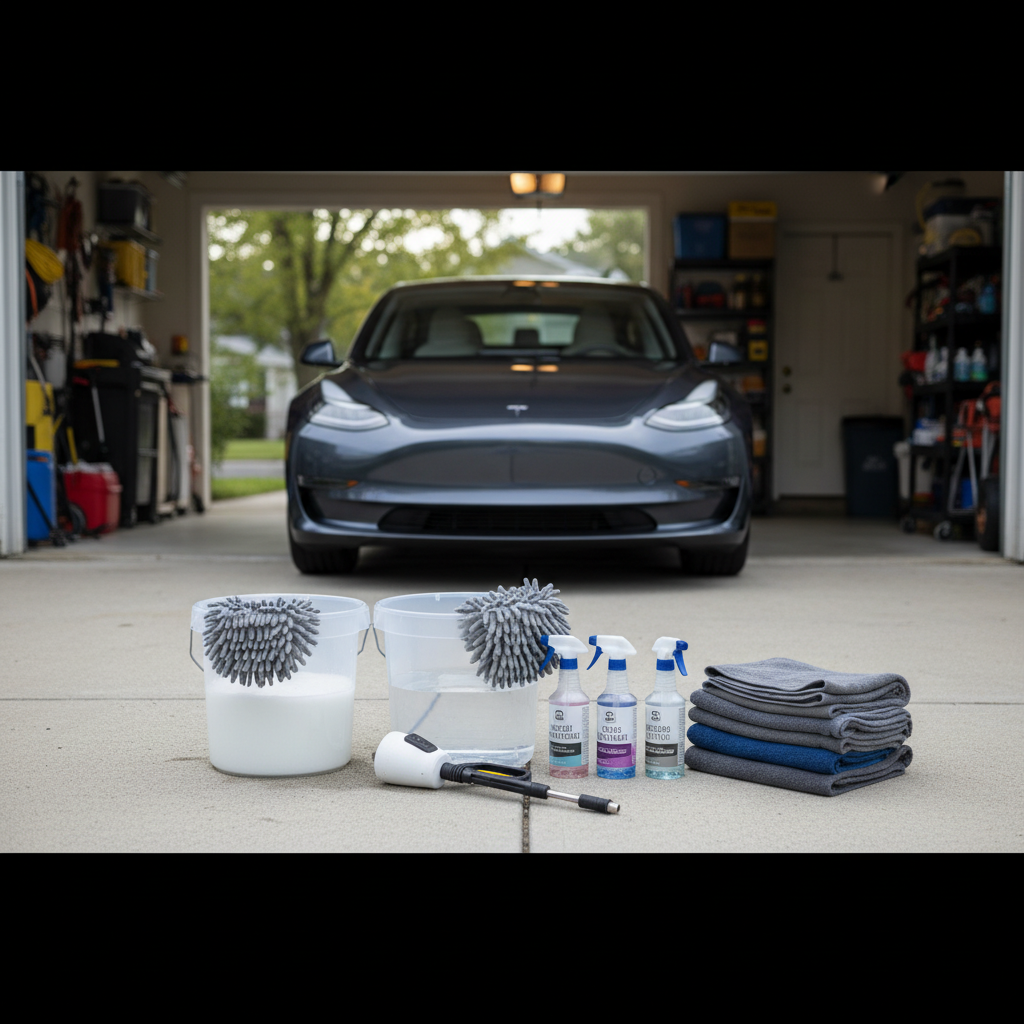
Essentials for exterior
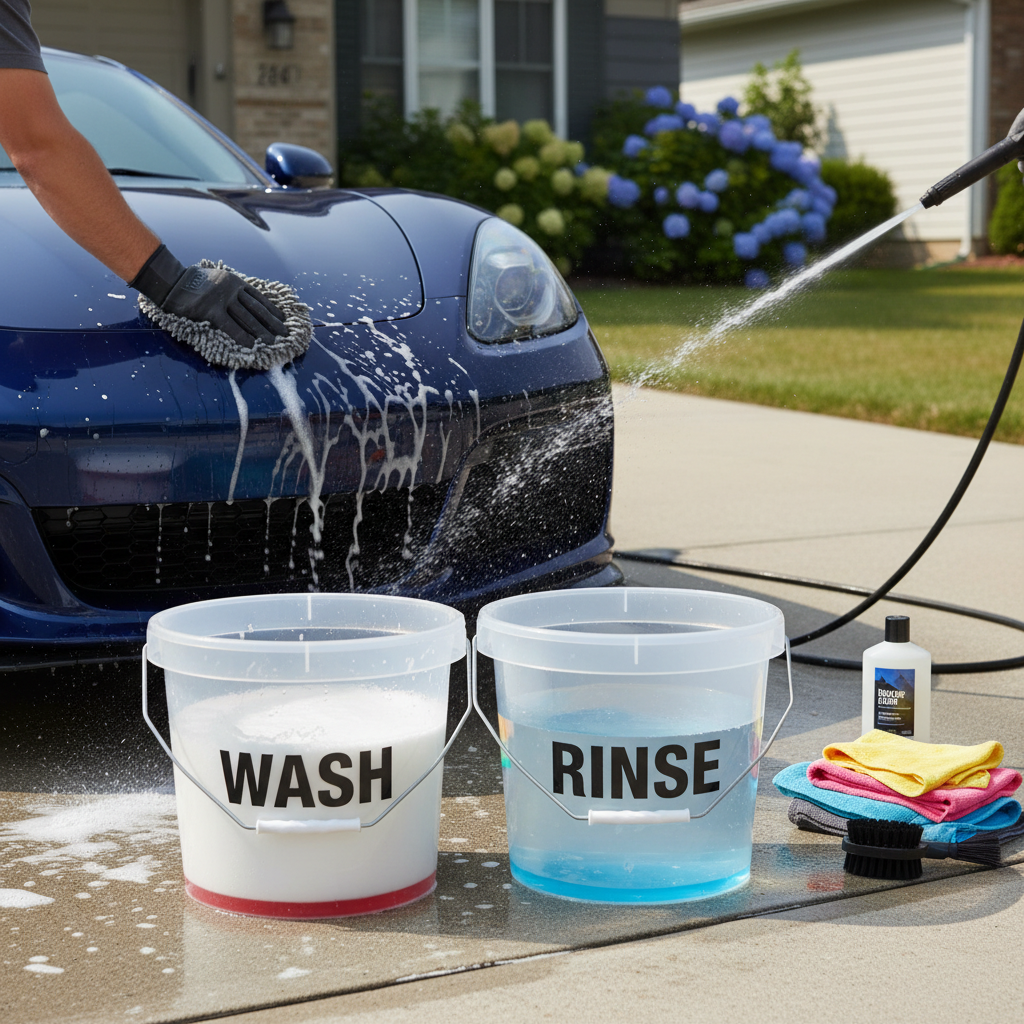
- 2 buckets (ideally with grit guards) for a safer wash.
- pH-neutral car shampoo (gentle on existing wax/sealant).
- Microfiber wash mitt plus 8–12 plush microfiber towels.
- Wheel cleaner (choose acid-free unless you know your wheel finish).
- Drying towel (twist loop microfiber) or a small blower.
- Glass cleaner safe for tinted windows.
Optional but high-impact
- Iron remover and clay bar or clay mitt for decontamination.
- Spray sealant or ceramic spray for quick protection.
- Random orbital polisher + foam pads + a light polish (only if you plan to correct).
According to OSHA, chemical exposure controls like ventilation and appropriate gloves help reduce risk when using cleaners and solvents. If you’re working in a closed garage, crack the door, use nitrile gloves, and avoid mixing chemicals.
A realistic timeline: what to do in 1 hour vs. half a day
Most people quit halfway because the plan is too ambitious. Use this table to match effort to outcome.
| Time | What you do | What you’ll notice |
|---|---|---|
| 45–75 minutes | Wheels + safe wash + dry + quick spray protection | Looks clean, better gloss, easier next wash |
| 2–3 hours | Add decon (iron + clay) + interior wipe/vac | Smoother paint, glass clearer, cabin feels “reset” |
| 4–7 hours | Add polish step + deeper interior clean | Noticeable swirl reduction, higher clarity, more “pro” finish |
If you’re learning how to detail a car at home for the first time, the 2–3 hour version is the sweet spot: big visual improvement without getting lost in polishing.
Exterior wash, done the way that prevents swirls
This is where “looks fine” becomes “why is my paint scratched in the sun.” Swirls often come from washing and drying, not driving.
1) Wheels and tires first
- Rinse wheels and wheel wells thoroughly.
- Spray wheel cleaner, agitate with a dedicated wheel brush.
- Scrub tires until foam turns less brown, then rinse.
Key point: use separate tools for wheels, brake dust can scratch paint.
2) Pre-rinse and contact wash
- Rinse top to bottom to remove loose grit.
- Wash from the roof down, one panel at a time.
- After each panel, rinse the mitt in the rinse bucket, then reload with soap.
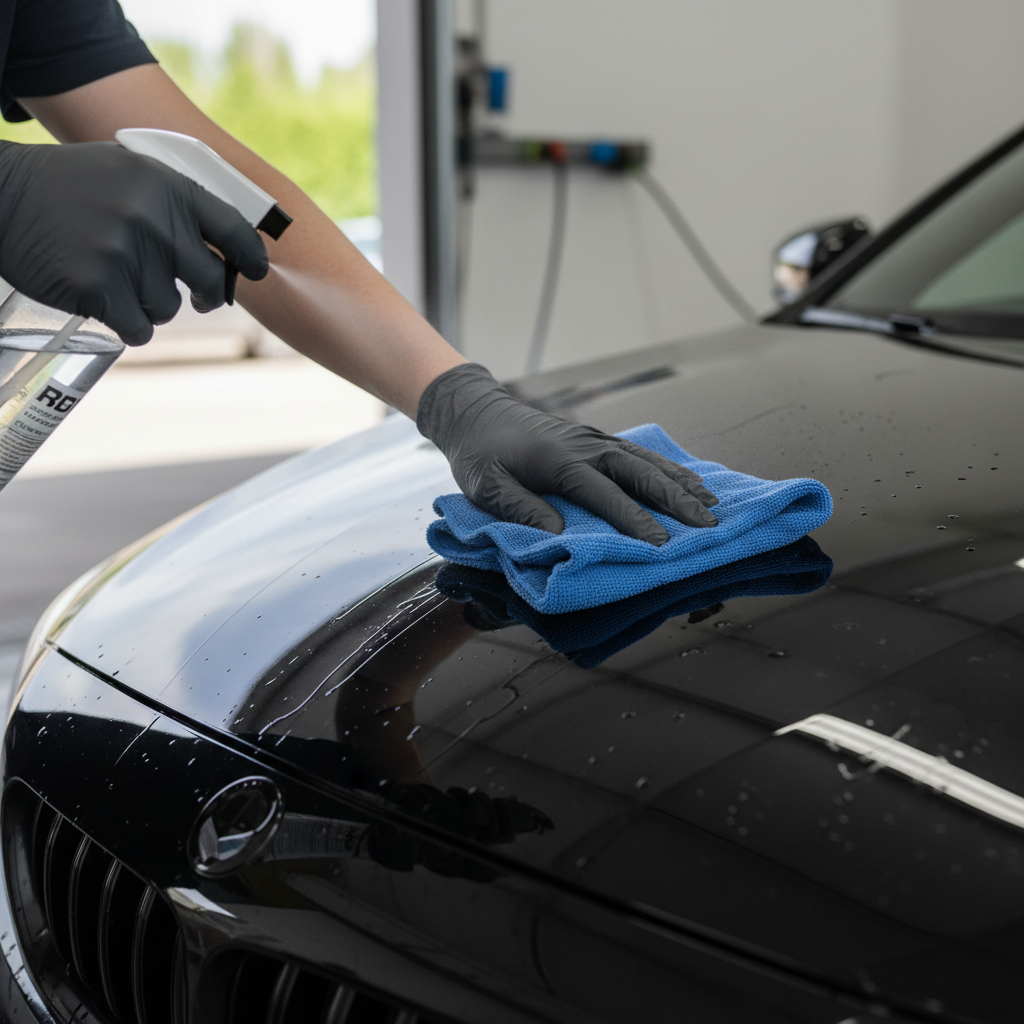
3) Drying without dragging dirt
- Sheet water off panels with an open hose (no nozzle) if possible.
- Dry with a dedicated drying towel using light pressure.
- Use a drying aid (spray sealant or quick detailer) to reduce towel friction.
If your water is hard, try washing early morning or late afternoon, and keep the surface wet so minerals don’t bake in.
Decontamination: the step DIYers skip, then wonder why paint feels rough
Even after a careful wash, the paint can feel gritty because contaminants bond to clear coat. Decon is what makes protection bond better and look cleaner.
Iron remover (easy win)
- Spray on cool paint in the shade.
- Let it react, then rinse well.
- Avoid letting it dry on the surface.
Clay bar or clay mitt (use gentle technique)
- Use clay lubricant, not plain water.
- Glide with almost no pressure, fold clay often.
- Stop if you drop the clay on the ground, it can pick up grit.
Decon can add light marring on softer paint, that’s normal. If you care about perfection, follow with a light polish, otherwise apply protection and move on.
Paint enhancement: polishing at home without turning it into a project
Polishing is where people get nervous, and that’s fair. A random orbital polisher is generally safer than a rotary, but you still need restraint.
- Start with the least aggressive combo: finishing polish + soft pad.
- Test spot on a small section before committing to the whole car.
- Keep pads clean, a dirty pad can haze paint fast.
- Avoid sharp edges and raised body lines with heavy pressure.
According to NHTSA, clear visibility is a key safety factor for driving. If polishing feels like too much, you can skip it and focus on wash, decon, and glass clarity, that already improves day-to-day visibility.
For many garages, a “one-step” light polish once or twice a year plus regular protection is a realistic way to keep paint looking sharp without living in your driveway.
Interior detailing: clean, then protect, without making it shiny
A clean interior should feel dry and neutral, not greasy. Shiny dressings can look “done,” but they often attract dust and can make pedals slippery, so use them carefully.
Fast interior reset (30–45 minutes)
- Remove trash and floor mats, vacuum seats and carpets.
- Use an interior cleaner on a microfiber towel, wipe high-touch areas.
- Detail vents and seams with a soft brush.
- Clean glass last with a dedicated glass towel.
Spot treatment tips
- Fabric stains: use a fabric cleaner, blot instead of scrubbing hard.
- Leather: use leather-safe cleaner, then a conditioner if the surface feels dry.
- Odors: vacuum thoroughly, then consider an enzyme-based product. Persistent smells may need professional extraction.
When you’re figuring out how to detail a car at home, interiors are where “less product” usually wins, especially on screens and piano black trim.
Protection options: what to choose and when
Protection is what keeps your work from disappearing after the next rain. Pick a product that matches your patience, not just the label.
- Spray sealant: quick to apply, solid gloss, good for beginners.
- Traditional wax: warm look, can be forgiving, but shorter durability.
- Ceramic spray: often stronger water behavior, can streak if overapplied.
- Coating: longer lasting but prep-sensitive, best saved for a serious weekend or a pro install.
Practical rule: if you don’t want to polish, don’t chase a “permanent” coating. A simple sealant refreshed every few months tends to look better in real life.
Quick self-check: why your results might not look “pro” yet
- Your wash mitt or towels feel rough, or you’re using old bath towels.
- You wash in direct sun and the soap dries before you rinse.
- You reuse wheel towels on paint.
- You apply protection too thick, then fight streaks.
- The paint feels rough after washing (you probably need decon).
- Glass looks clean at night but smears in morning sun (wrong towel, too much product, or oily film).
If two or more match your situation, fix the process before buying another “miracle” bottle.
Common mistakes and when to get professional help
Some issues are fixable at home, others become frustrating fast.
- Mixing chemicals: don’t combine cleaners, especially anything with bleach or ammonia. If you’re unsure, check the label and keep products separate.
- Using household degreasers on paint: they can strip protection and sometimes stain trim.
- Over-polishing: chasing every defect can remove more clear coat than you realize.
- Ignoring safety: if a product smells strong, use ventilation and skin protection, and consider professional advice for sensitive skin or respiratory concerns.
Get help if you see peeling clear coat, deep scratches you can catch with a fingernail, or stains and odors that keep returning after cleaning. In those cases, a reputable detailer can often save you time and prevent accidental damage.
Conclusion: a simple plan you can repeat
If your goal is to learn how to detail a car at home like a pro, keep it repeatable: wheels first, safe wash, dry gently, decontaminate when paint feels rough, then protect. That loop beats a once-a-year marathon every time.
Action steps: do one careful wash this week using the two-bucket method, then add a spray sealant as your “finish.” Next wash, note how much easier the dirt releases, that’s your sign the process is working.